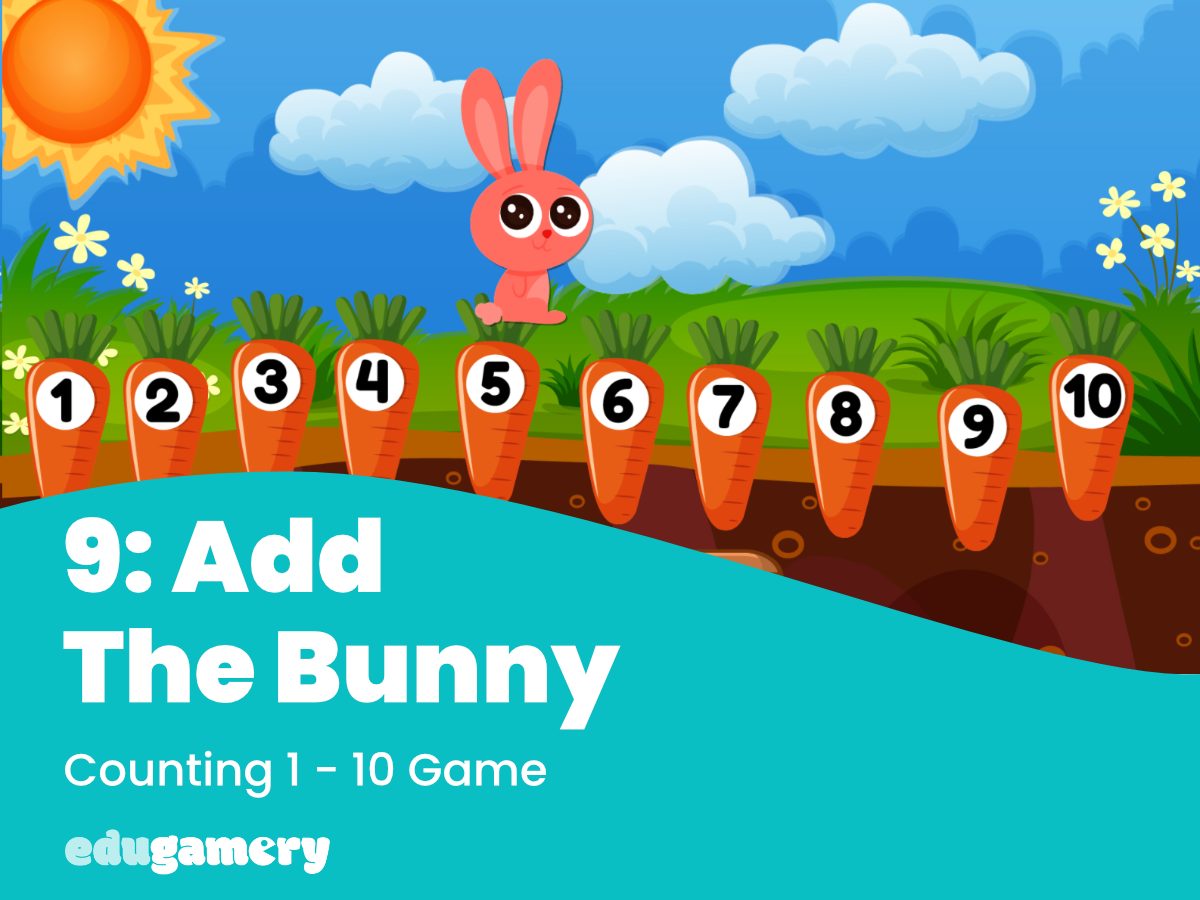
Now we are going to add the bunny which will move each time the correct carrot is clicked.
.
This is very simple to do and we have done many of these steps already.
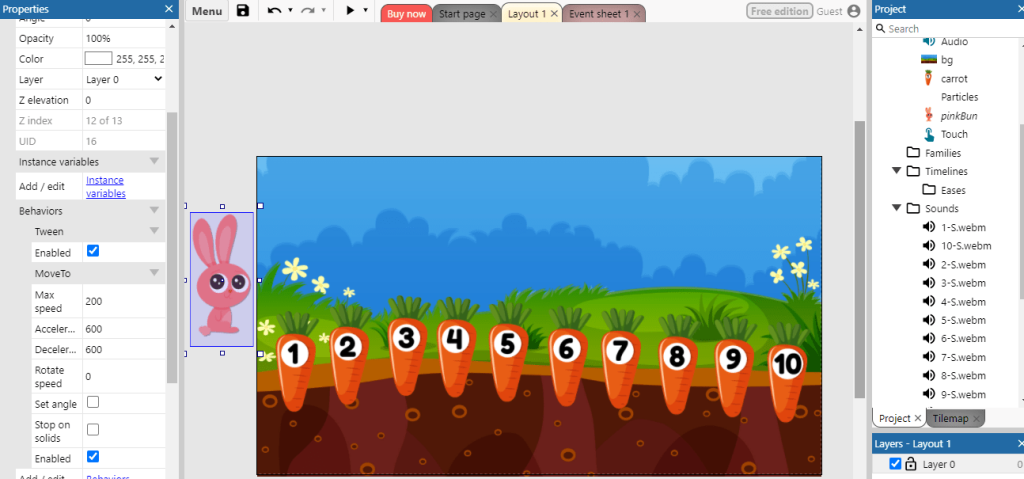
First, ensure you are on the Layout screen and drag the bunny graphics onto the page. This is the same way we did it when we added the carrots. All the graphics are in the one bunny object.
Place the bunny to the left of the background image. He won’t be on the screen at the start of the game.
You will have noticed in the video at the top of the page, the bunny is animated. When we loaded the carrots, we wanted to stop the image frames from playing. However, with the bunny we want the frames to play. Therefore double click on the bunny icon in the right hand Project panel and open the animation editor:
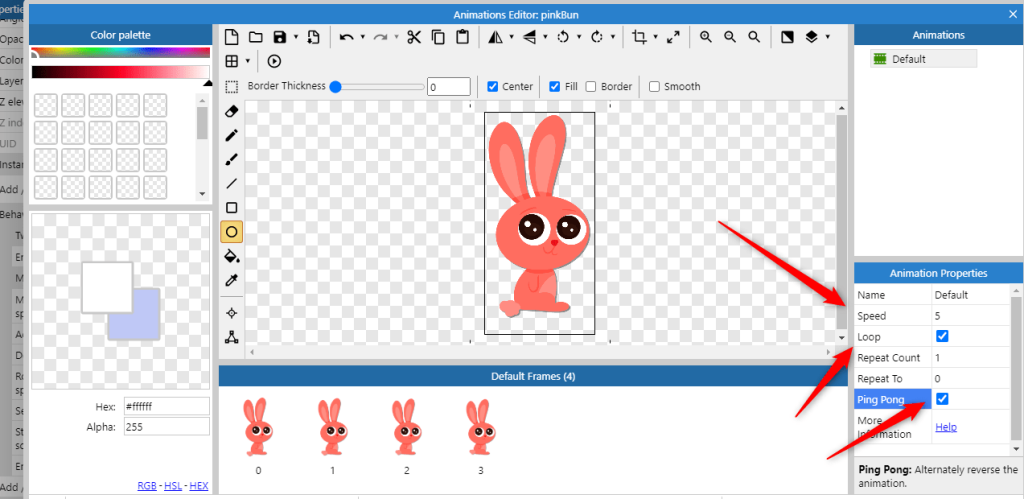
Here, we will set the following:
- The speed we want the animation to play
- We want to check the ‘Loop’ option as we want the animation to repeat
- Check the ‘Ping Pong’ option, which means the animation runs forwards and backwards.
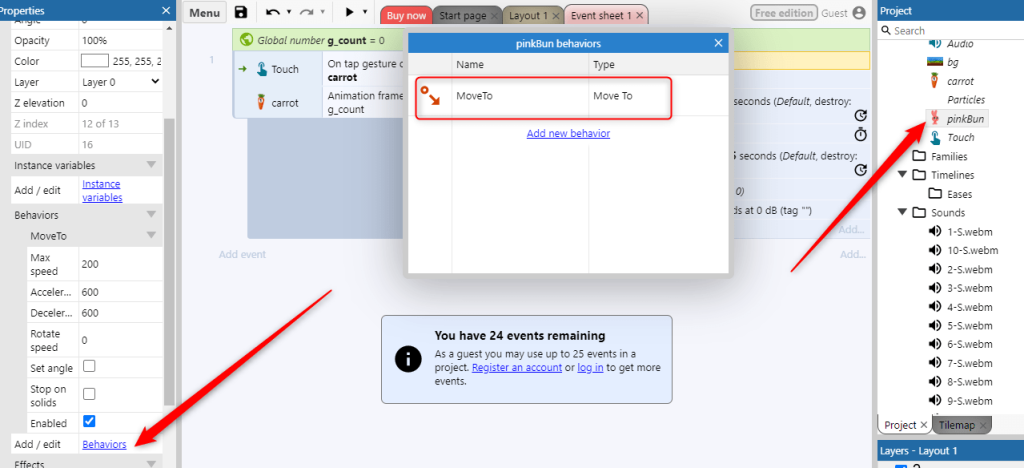
Add Move To Behaviour
We need to add ‘Move To’ functionality to the bunny. This is so we can instruct the system to move the bunny to a given point.
Click on the bunny to make sure it is active and then look in the left hand properties panel for the Behaviour option. Click to ‘Add a new behaviour’ and select ‘Move To’.
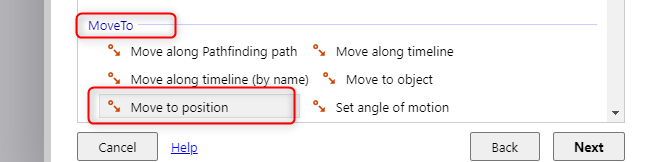
Add Move To Action
We now need to add the Move To action.
Click on ‘Add new action’ and select the bunny object and look for Move to position option under the MoveTo heading.
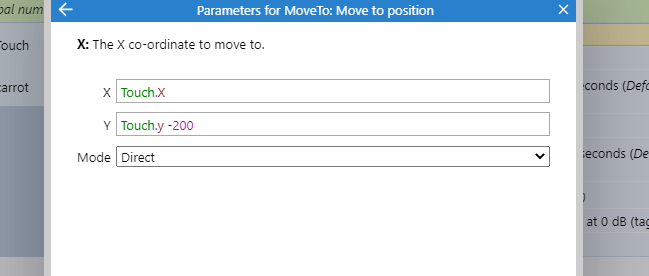
We now need to tell the system where we want the bunny to move to.
We want the bunny to move to the carrot which has just been clicked or tapped correctly and we can do that by moving the bunny to the position of the where the carrot was touched (clicked or tapped).
The coordinates on the page are given as X (across) and Y (down). Therefore we are telling the system that we want the bunny to move to where the carrot was tapped across the page and where the carrot was tapped down the page – MINUS 200!
This is because we want the bunny to be slightly above the carrot. The top left of the screen is 0, therefore by telling the system to move the bunny to Touch.Y -200, we are telling the system to move the bunny to 200 pixels above the touch position.
IMPORTANT
When you have added this action, drag it and move it to the top of action list.
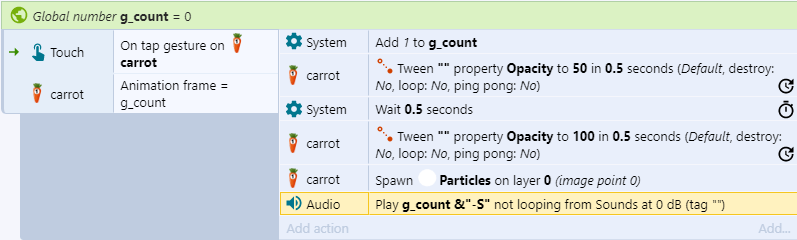
Your event sheet should now look like this: