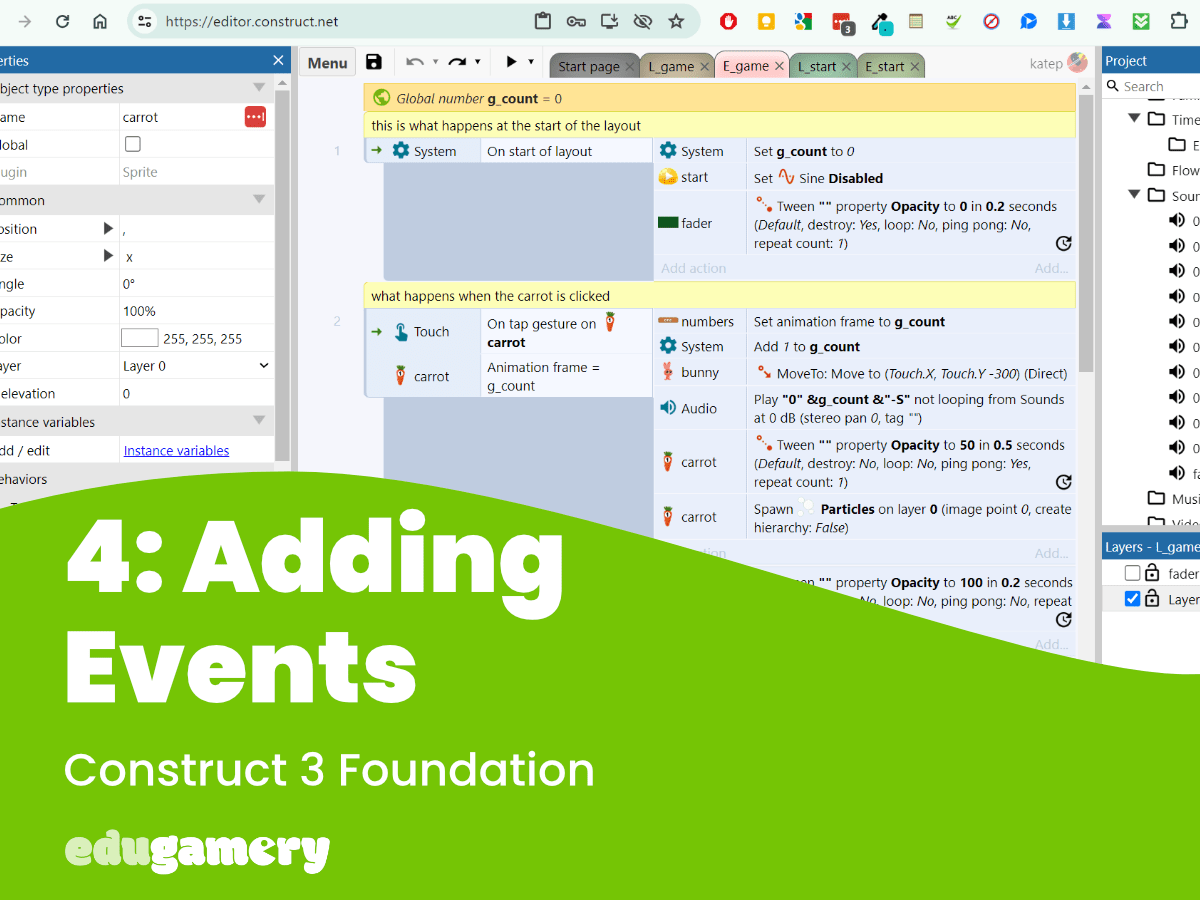
In this lesson we are going to take a deeper overview of the Event Sheet.
The Event Sheet is where the magic all happens! This is where we tell the objects how to act in order to make the game.
There are three key terms you need to know.
- Events – are a combination of conditions and actions which make things happen in a game.
- Condition – defines what needs to happen before an action can take place. For example, a condition could be when button is clicked, two objects collide, a countdown timer reaches 0 etc
- Action – an action is what happens after a condition met. For example, after the condition where two objects have collided, the action might be that a point is added to the score or a third object is created.
This will become much clearer when we see it in action.
Click and open the Event Sheet tab. You will then see we have an option to add an event.

Click to ADD EVENT. You will now be prompted to choose an object to apply the condition to.
In this case we are going to select object 1.
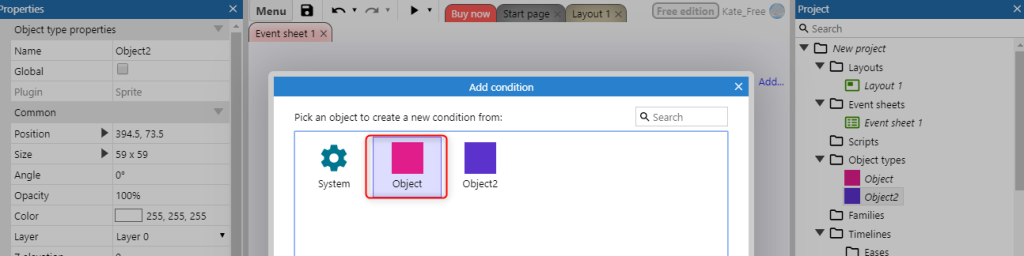
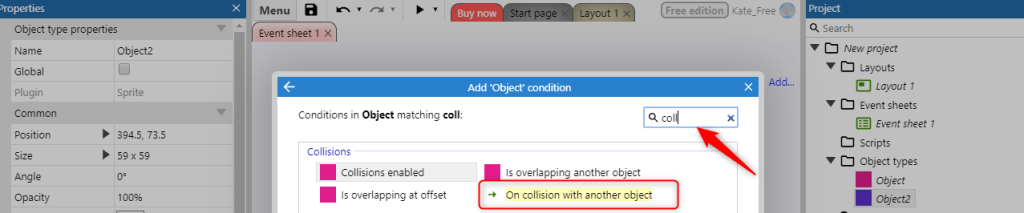
A window will open with a selection of different conditions to choose from. As with other windows, we can search the list of options or start typing the name into the search bar.
We’re going to set up a collide condition, which means that a certain action will be taken after our pink object collides with another. Select ON COLLISION WITH ANOTHER OBJECT.
You will now be prompted to say which other object you want this condition to work with. For example, if you had a bird, bee and flower in your game, you might set up a condition which only happened when the bird and bee collided.
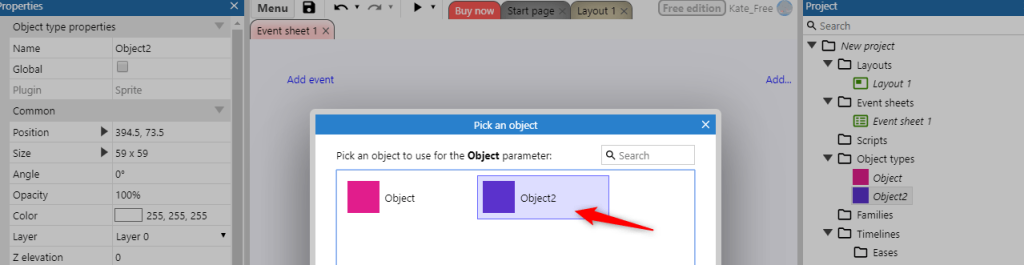
Select the object you want the collision to work with – in this case Object 2.
You will now see the first part of the event is in place.
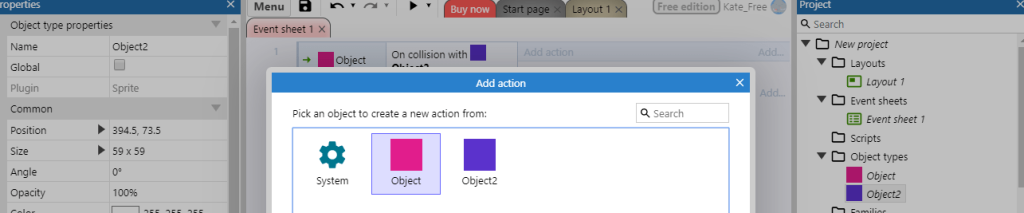
Now click on ADD ACTION and this is where we say what we want to happen when this condition (the pink object colliding with the blue object) is met.

When you click on ADD ACTION you will be prompted to choose the object you want to create the action from.
Click the first object as this is where we want the action to happen:
You will see a range of different options available to you. For ease, we’ll keep it simple and say when the pink and blue object collide, the pink object will be destroyed.
Either scroll through the options or start typing DESTROY into the search box and select the DESTROY option.
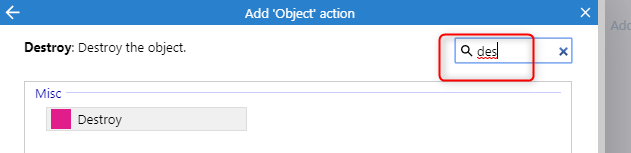
You will now have an event that looks like this:

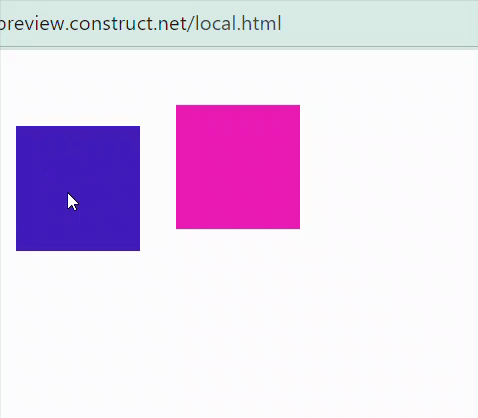
Click on the arrow in the menu bar and we can see what happens in action!

When we drag the pink object onto the blue one, the pink object is destroyed.
Well done! While this might not be the most exciting of projects, it’s introduced you to some of the essential core foundations of Construct 3 and this foundation will help you start creating some fun educational games.
Think of how we can build on what we’ve just done:
- Match two objects, for example a word and picture, a number and formula, a word in two languages etc.
- Sequencing games, for example drag the objects into their correct position
- Counting game, drag the correct number of objects into place.
and so much more!
This lesson has introduced you to some of the key features we will be using in Construct 3.
So armed with this foundation it’s now time to start creating our first game!