How It All Works
In the last post we took and overview of the Construct 3 interface and the role the different elements take. However, the best way to see what this all means and how it works is to jump in and create a couple of objects and see what happens.
We are going to:
- Create an Object using the Layout View
- See the Object in the Project window
- View the Object properties in the Property window
- Give the Object a behaviour (make it do something), in this instance we are going to add drag and drop behaviour)
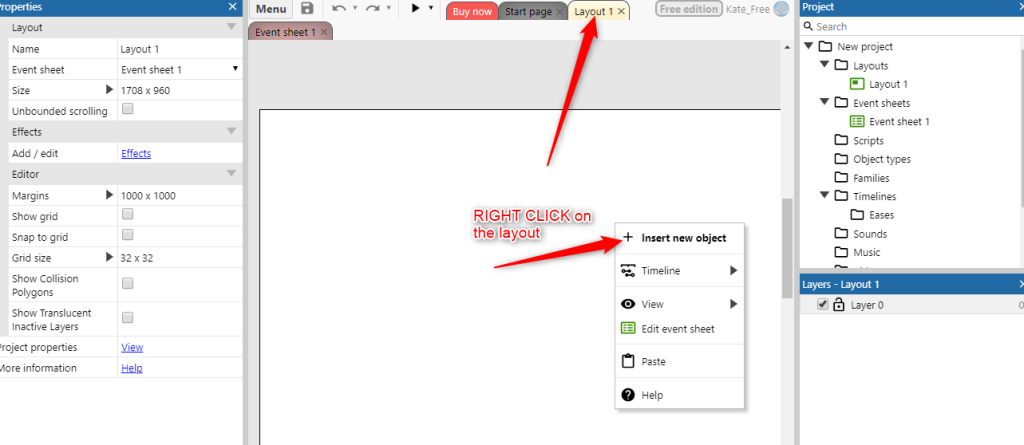
Create New Object
Make sure you are in the ‘Layout’ view and RIGHT CLICK on the canvas. This will open a pop up and you want to select INSERT NEW OBJECT.
:
Click on the INSERT NEW OBJECT option and a new window will open. This contains all the different objects and elements you can add to your game.
You will see there are many different things you can add, from audio through to touch controls and special effects.
We’re going to add a sprite object. A sprite, in game making, is an image object.
As you have seen, there are many different objects we can add to our game, so the quickest way to find what you are looking for is often to type the word into the search bar. Just the first couple of letters will help to narrow down the objects to pick from.
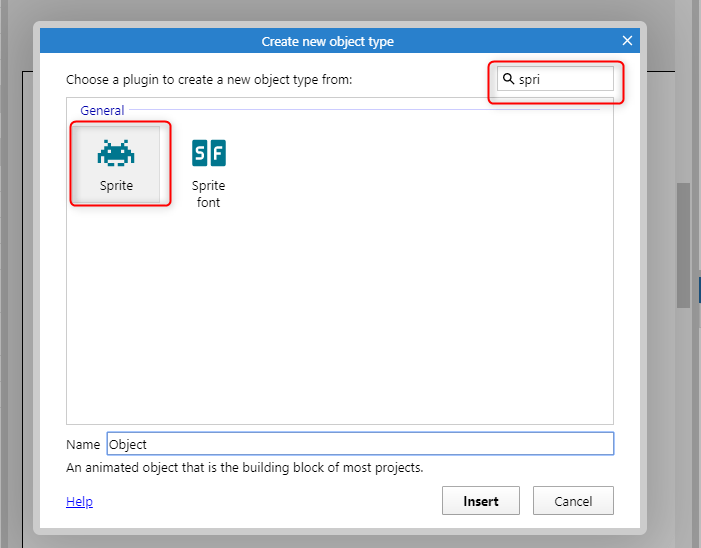
Select the SPRITE object and click on the canvas. This will open up the sprite editor window. We’ll quickly change the color of the sprite by using the paint bucket tool. However, we could also add an image or create more fancy sprites using this editor.
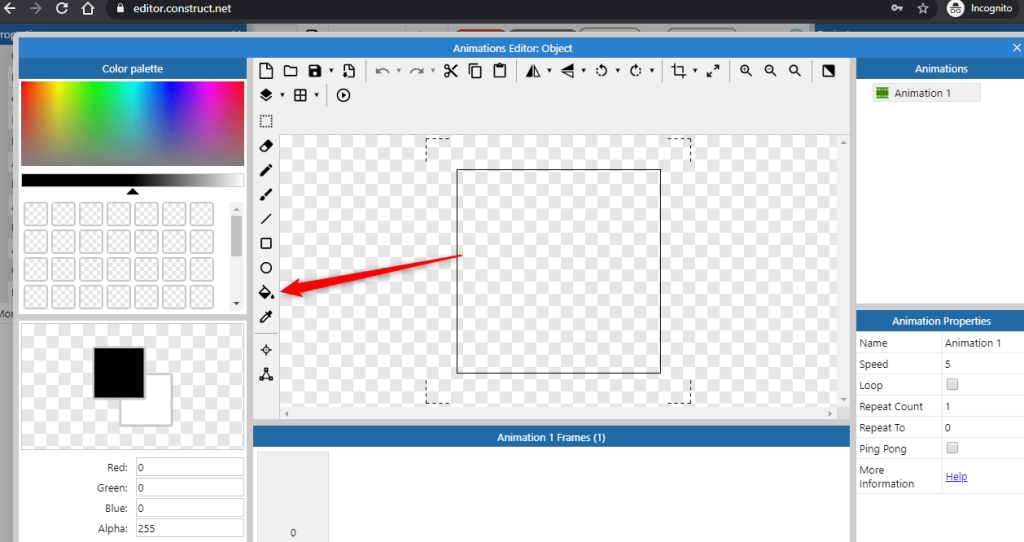
Use the paint bucket tool to fill the square with any color you desire and when you are finished, just click the X to close the window and the sprite will be saved.
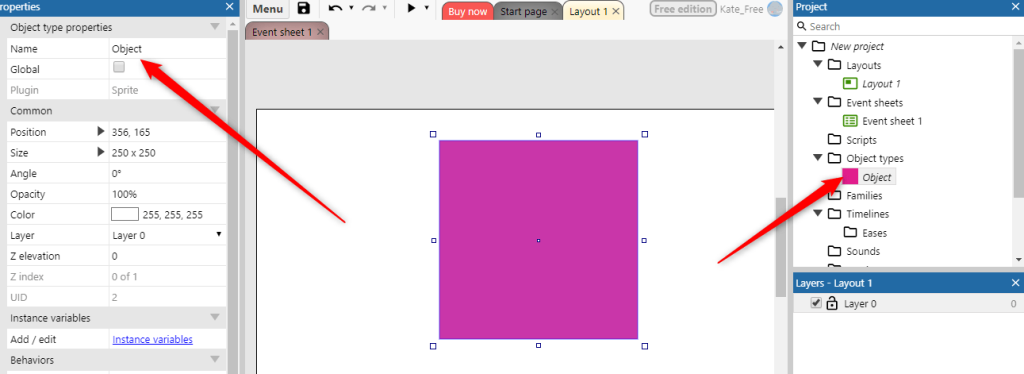
You will now see that the sprite object you have just created is shown on the canvas.
If the sprite object isn’t on your canvas, you can drag it across from the sidebar on the right. You can also rename the object in the sidebar on the right by right clicking on the name.
If you want, you can resize the object by pulling or pushing the little handles around the square.
Tip: Renaming your objects is a good habit to get into. Particularly Sprites as this helps keep things in order when the game gets bigger. It’s also useful to adopt a set of naming conventions, so things are the same in each of your projects. You will find more on naming conventions in Construct 3 HERE.
The Object Properties Panel
We spoke about the property panel earlier – however as there were no object in our game, there was not a lot to see. Now we have added an object, you can see in the sidebar on the left that we can see the properties of this object.
At the moment, the object doesn’t have many properties, you will in the property panel we can see key information about this object, such as size and position on the layout.
However, when we start adding behaviours to the objects, the property panel becomes more interesting as we can see what the object is set to do.
Object Behaviours
The object behaviours determine the way an object behaves. At the moment, the object we have created hasn’t got any behavior, so it doesn’t behave in any particular way, however, we can add behaviours to make the object move and behave in different ways as part of the game play.
Just for this demo, select BEHAVIOUR from the left side bar and then select the DRAG AND DROP behaviour from the window that opens. As when we were adding the sprite object, it will sometimes be easier to start typing the name of the behaviour into the search bar.
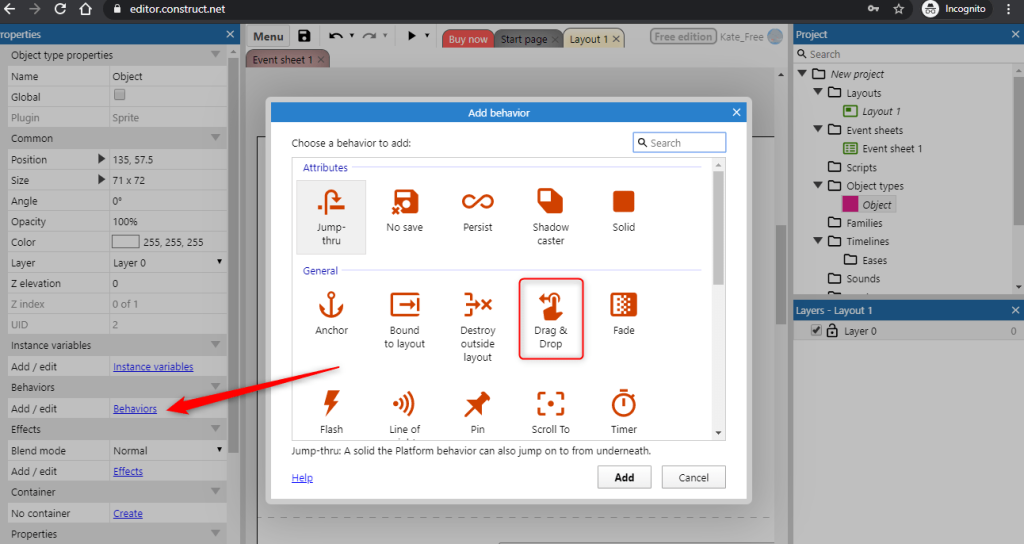
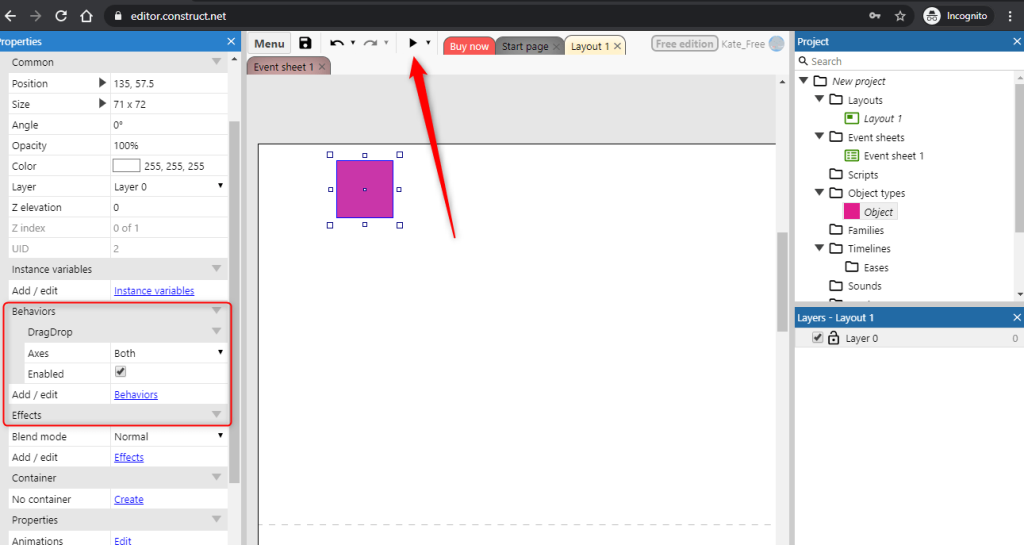
When you have selected DRAG AND DROP and clicked ADD, you will see a new section is added to the property panel on the left which shows the drag and drop behaviour. For many behaviours we can edit different aspects of the behaviour in this panel or within the game itself.
For the drag and drop behaviour, there are not many options, so we’ll just leave it as it is.
To look and see what effect this has had on our first object, click on the PREVIEW button (arrow in the top menu bar). This will open up a preview of the layout, if you click on the object now, you will see you can drag it and move it around the screen.
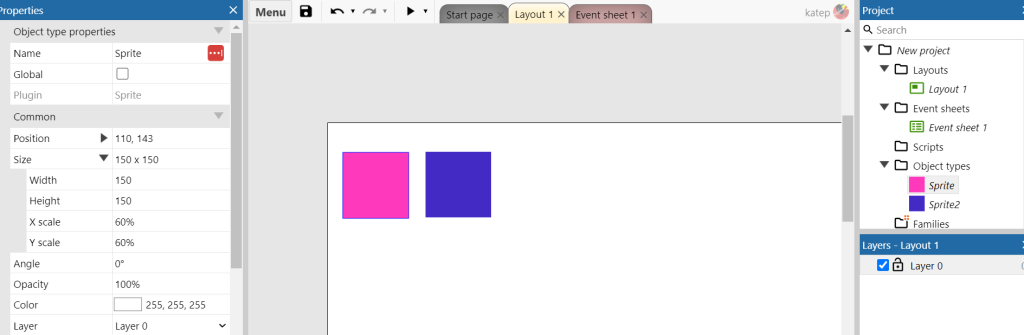
Before we leave this overview of the Construct interface, create a new object and call it Object 2 (RIGHT CLICK on layout > select SPRITE > use bucket tool to color the sprite and then add it to the layout > resize as required). There is no need to add a behaviour.
You will now have TWO objects in your layout.
We will leave this lesson here. In the next lesson we’ll look at the Event Sheet