In this lesson we are going to look at the Construct 3 interface. We won’t spend long on this as the best way to get familiar with the interface is to jump in and start making games – however, we will spend a few minutes getting orientated and explaining a few key terms.
When you are logged into your account you will arrive at a start page that looks like this (note if you are seeing a different screen, make sure the ‘start page’ tab is selected.
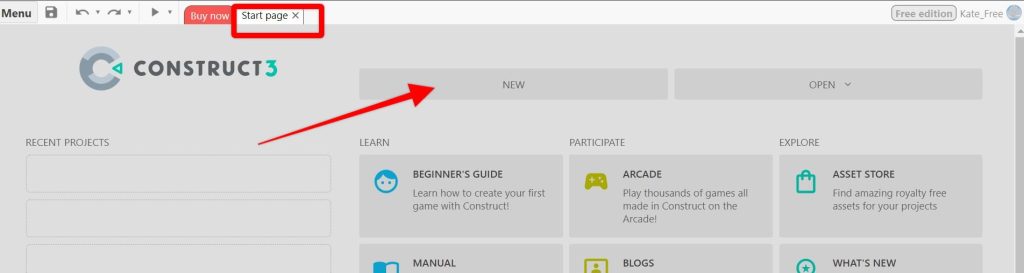
To get open a new project, select the New Project button. This will then open a window which gives you different options for the game project.
Because we’re just getting familiar with the interface, don’t change any of the setting and name the project as you like – we will be deleting it later.

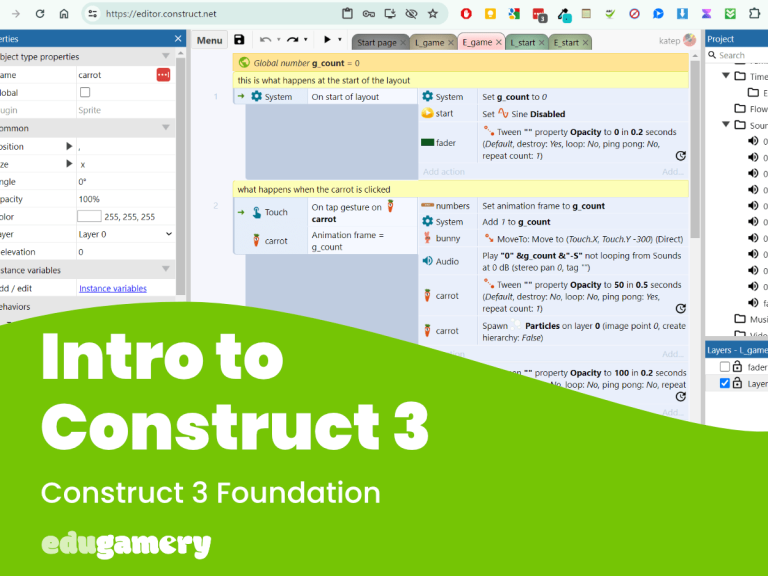
The Construct 3 Interface
When the new project opens, you will see it looks like this, and there are a few important things to note.
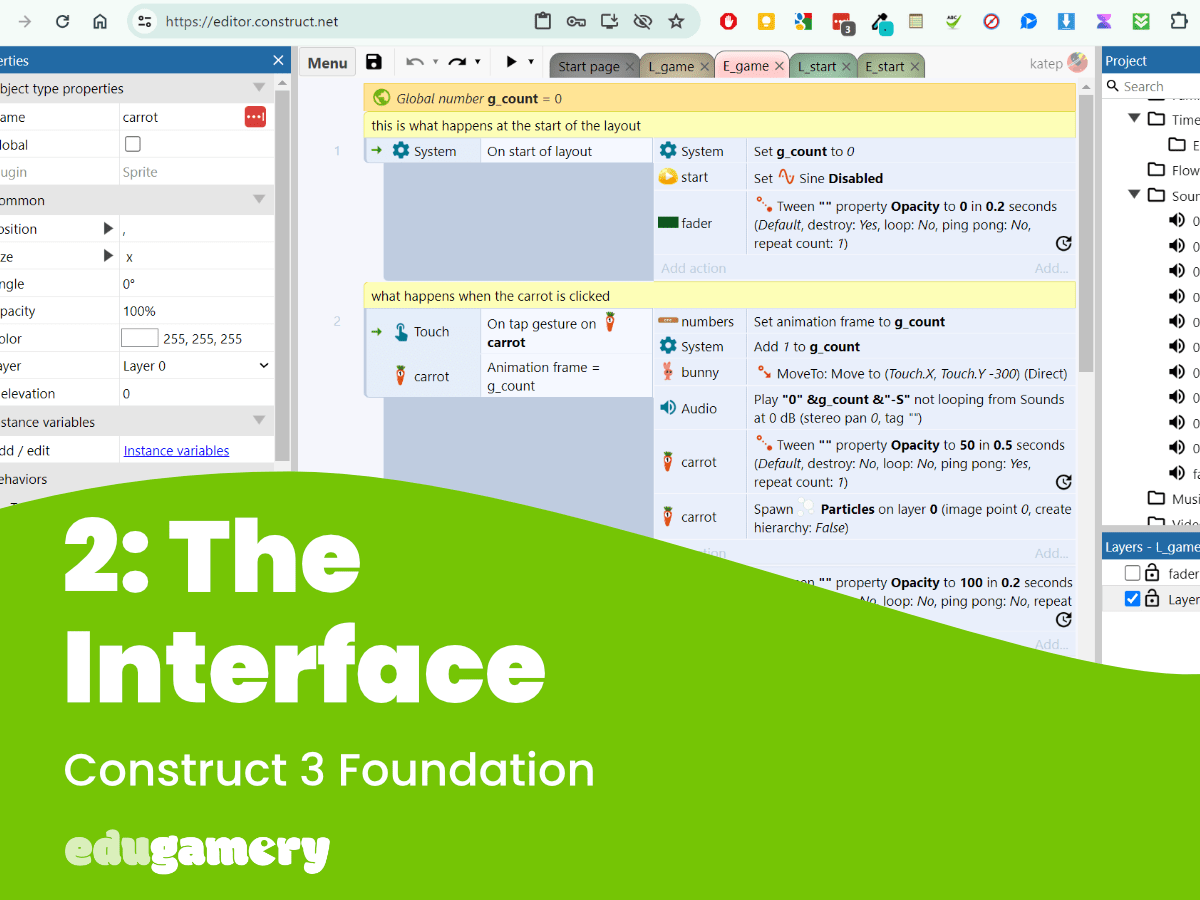
You will see the page is divided with a menu bar on either side and a section with tabs in the middle.
Let’s take a look at these individually:
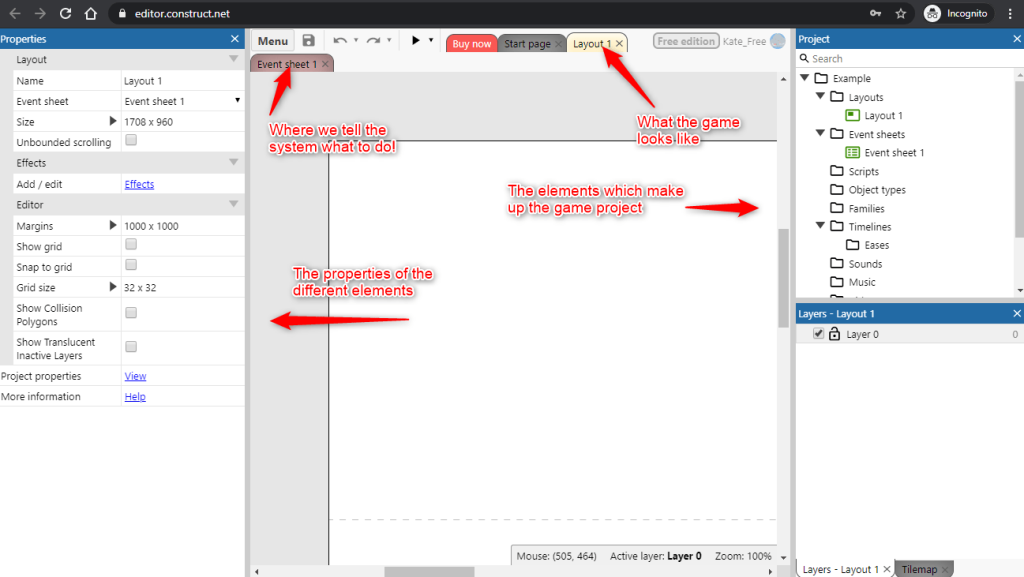
Properties Menu Bar (Left)

The properties menu bar on the left gives you the properties of any selected item. At the moment, because we have a completely empty project, it is just showing us the properties of the project itself. However, as we add elements to the game, you will be able to see their properties in this section as below. In this example we can see that the properties section is showing us important information about the ‘bunny’ object.
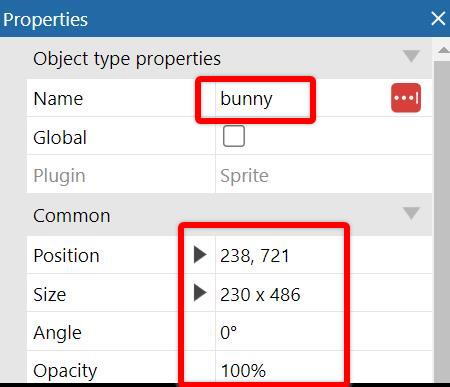
A property is anything which defines an object – for example size, how it behaves etc.
Project Menu Bar (Right)

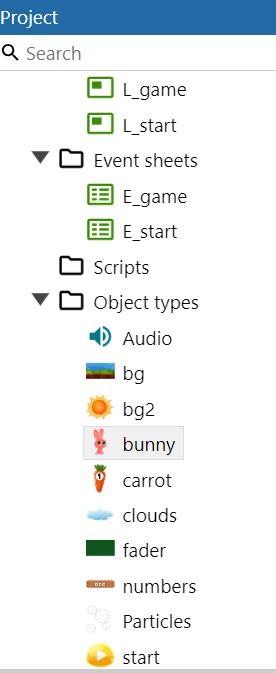
This shows you the elements that make up the project. For example, the objects, text, audio and sound effects etc. At the moment it is empty, but we’ll go ahead and add an object in a minute to see how it looks. When you click on an object in the Project Menu – you can view the properties in the Properties bar.
In the example below, you can see how the Properties bar contains all the different elements which make up the project:
TABS
Next we’re going to look at the tabs at the top of the page. To start, you are likely to have three tabs, Start, Layout and Event Sheet.
Layout Tab

The layout tab at the top of the page is where we can see the layout of the game. The “Layout” tab, also known as the “Layout View”, is essentially our game’s visual editor. It’s where we design and build the individual screens or levels of our game. Here’s a breakdown of what we can do in the Layout view:
- Arrange objects: This is where we place all the visual elements of your game like characters, backgrounds, platforms, and items. We can think of it like a painter’s canvas where things can be placed to create the game (although we can also add elements as part of the game – but more on that later).
- Set up the environment: You can define the overall look and feel of your level by setting the background image and other properties.
- Design the gameplay area: The dashed rectangle in the top-left corner of the layout indicates the viewport, which is the portion of the game visible to the player. You can use this to design the playable space and ensure everything fits correctly.
Here are some additional points to remember about the Layout view:
- Construct 3 uses the term “layout”, however you may also hear terms like “scene,” “room,” or “stage” found in other game development tools.
- You can have multiple layouts in your project, allowing you to create different levels, menus, or screens for your game. For example, you might have a ‘splash screen’ or start layout, which contains just the game name and a fun image, and the second layout being the game layout, which is where the player actually plays the game.
- The Layout view works alongside the Event Sheets which we look at below, which define how objects behave and interact within the layout.
If you’d like to learn more about the Layout view and its functionalities, you can refer to the official Construct 3 documentation for a detailed explanation: https://www.construct.net/en/make-games/manuals/construct-3/interface/layout-view
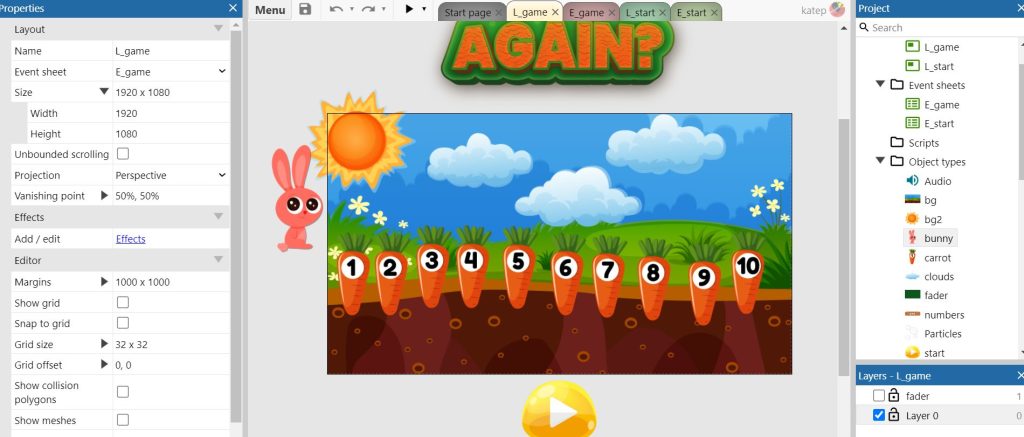
Here’s an example of the layout view for our Carrot Count game:
Events Tab

The events tab is the home of the events sheet. This is what gives the system the instructions to make the game. The Event Sheet in Construct 3 is the brain behind your game’s logic and interactivity. It’s where you define how objects in your game (placed in the Layout view) behave and react to events.
Here’s a deeper look at Event Sheets:
- Defining Game Logic: Imagine a set of instructions that tell your game what to do when certain things happen. For instance, you might create an event that makes your player character jump when the spacebar is pressed. This is where we give those instructions
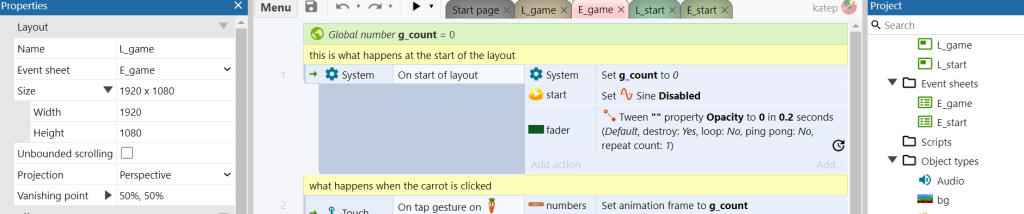
- Event Conditions and Actions: An event sheet is made up of conditions and actions. Conditions are like triggers that check if something specific happens in the game. If the condition is met, the corresponding actions are executed. We’ll discuss this in more detail later, however the condition might be that ‘someone clicks on the number 6’ and the action would then be ‘the number 6 turns transparent’.
- Multiple Event Sheets: Your game can have one or more Event Sheets. Typically you might have a separate event sheet for each layout.
Here are some additional things to know about Event Sheets:
- Event Sheet Order: Events are processed top-down within an Event Sheet. This means the conditions and actions at the top are checked first, followed by those below.
- Event Sheet Includes: For common functionalities used across multiple layouts, you can create a separate Event Sheet and “include” it on other sheets. This saves you from copying and pasting the same events repeatedly.
This is an example of an Event Sheet from the Carrot Count game:
If you’d like to get started with Event Sheets, there are many resources available. The official Construct 3 documentation offers a comprehensive guide: https://www.construct.net/en/make-games/manuals/construct-3/project-primitives/events/event-sheets
Putting it all together…
The best way for this to really make sense is to jump in and make some examples. Therefore head to the next tutorial and we’ll dive in and get hand’s on!