So far, we have loaded all the puzzle pieces into our tile object. We now need to arrange these on the layout.
First, we’ll need to adjust the size. This will depend on the number of puzzle pieces you are using. The size of the layout is 1920 x 1080. Therefore, the size of the puzzle when compiled cannot be bigger than this.
In this example, the puzzle is 4 pieces wide and 3 pieces deep. Therefore, I’m making the puzzle pieces 300 pixel square. This means the finished puzzle will be 1200 pixels by 900 pixels and will sit nicely on the layout.
In a 3 x 2 puzzle, if the images are 500px, your finished puzzle will be 1500px x 1000px and this too will sit nicely on the layout.
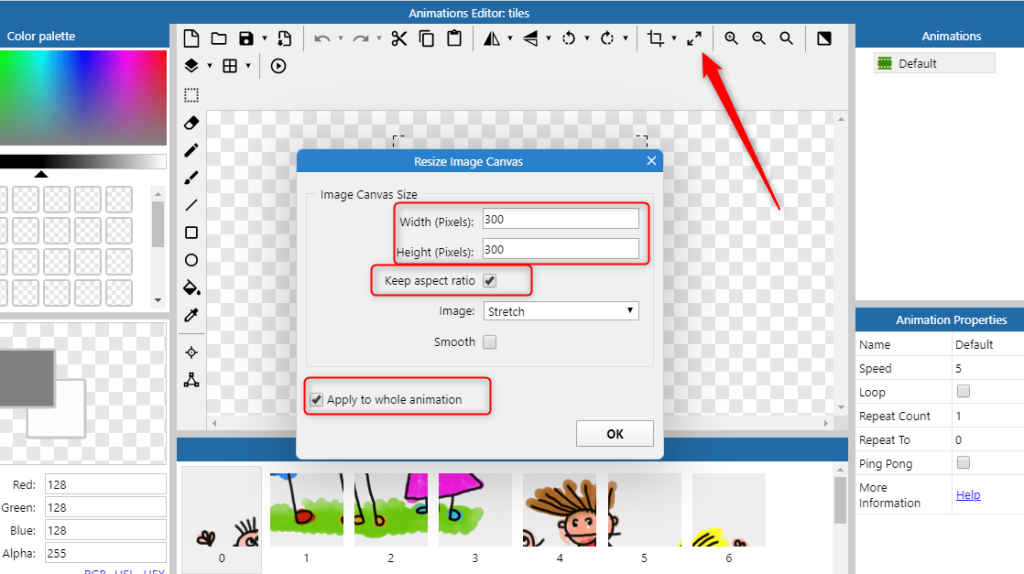
1/ Resize the Pieces
Click on the Tiles icon to open the sprite editor.
Click on the Resize icon and change the size as required – remember to keep the dimensions of width and height the same to give you square pieces (note, check the ‘keep aspect’ box to help).
Check the ‘Apply to whole animation’ to change all the puzzle pieces.
2/ Preview
Click on the ‘play’ preview button at the top of the page.
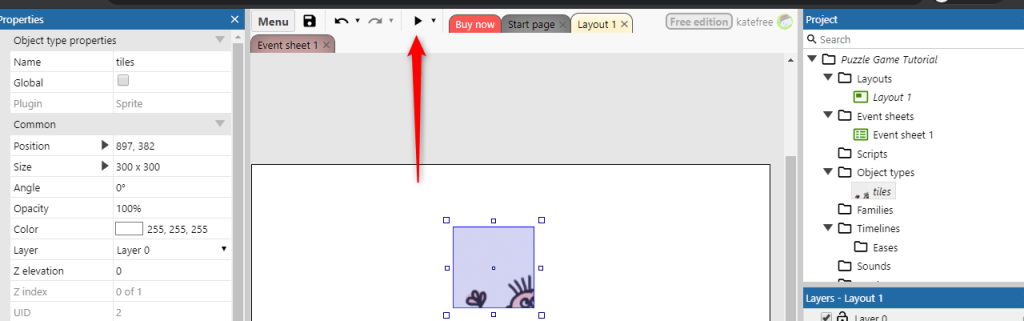
You will see that something odd has happened!
The game thinks the puzzle pieces are an animation, therefore it is scrolling through the images to create an animated effect. We need to stop this, so open the sprite editor.
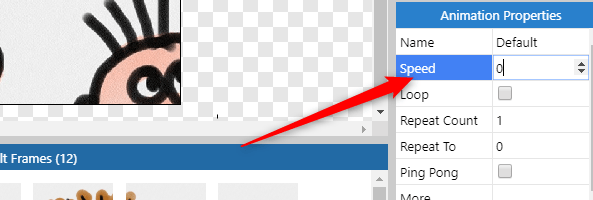
And change the ‘Speed’ to 0. This means that the game will no longer treat the pieces as an animation.
3/ Show and Snap to Grid
While we could just drag the pieces into place and carefully line them up by eye. The easiest way to do this is to turn on the grid and ‘snap to grid’ function. This makes it easy to line the pieces up accurately.
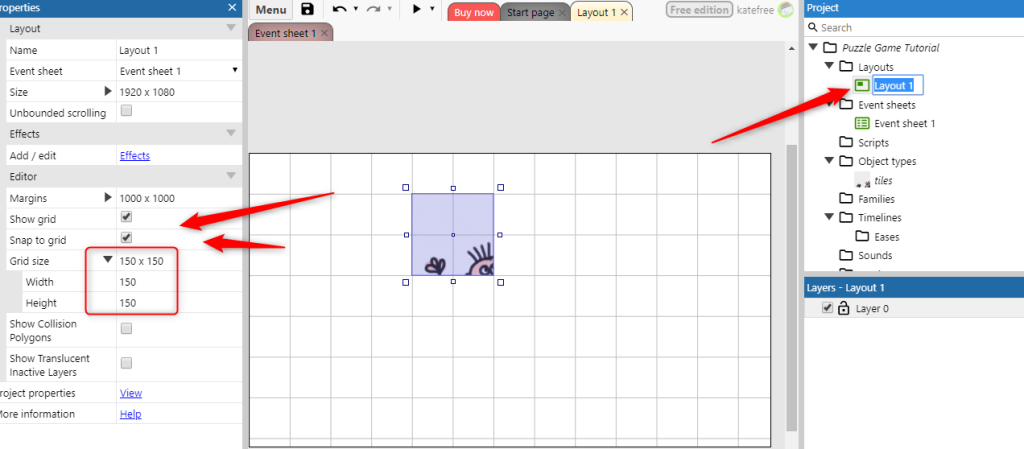
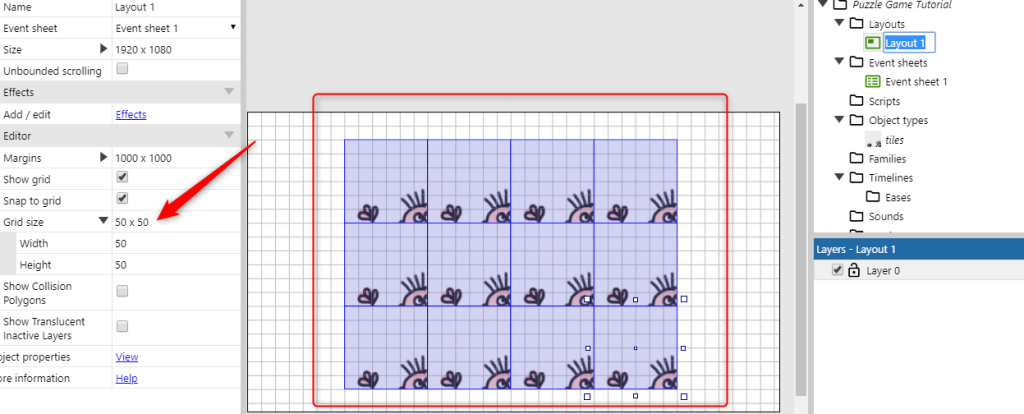
To do this, click on ‘Layout 1’. This will open the properties panel on the left, which shows the different options for this layout. Check the ‘Show Grid’ and ‘Snap to Grid’ boxes.
Change the grid size so it is half of your tile size. Because we made a tile of 300 pixels in the example, we changed the grid size to 150 x 150.
Now when you drag the piece around, you will see it snaps to place within the grid.
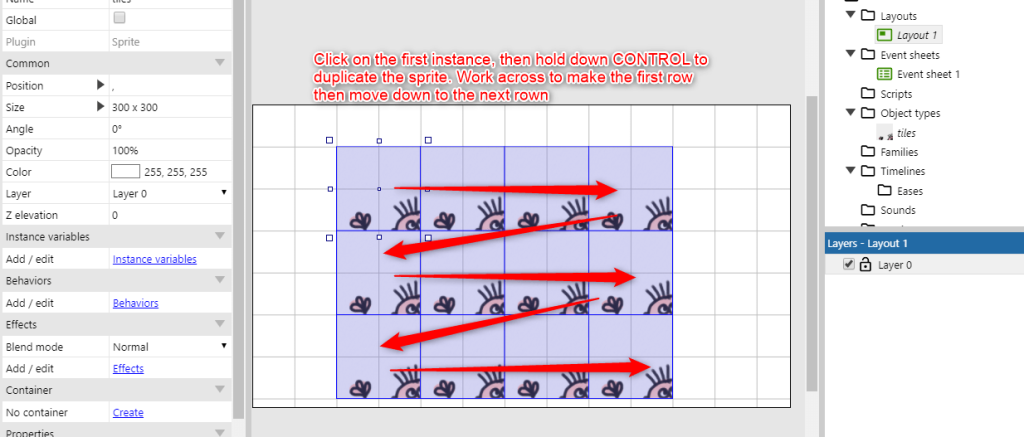
4/ Arrange the Pieces
Now to arrange the pieces!
Important: be constant with how you copy the pieces. Start at the top left, copy the pieces along the top row, then move to the second row on the left and make that row and repeat in this way for any other rows. You’ll see why this is important later.
To copy pieces, hold down ‘Control’ and click and drag. You can also right click on an object and select ‘copy’ and then paste, however this is slower.
This isn’t central on the layout, therefore, we can make the grid smaller, and drag the pieces into a more central position.
Change the grid size into a smaller number, but one that the tile size is divisible by. The tile in the example is 300 x 300 pixels, therefore we changed the grid to 50 x 50 pixels.
To select all the pieces, click and drag over all the pieces so they are highlighted and then just drag them into a more central position.
4/ Changing the Puzzle Images
The puzzle currently is displaying all the pieces – but they are all showing the same puzzle piece – so now we need to change that.
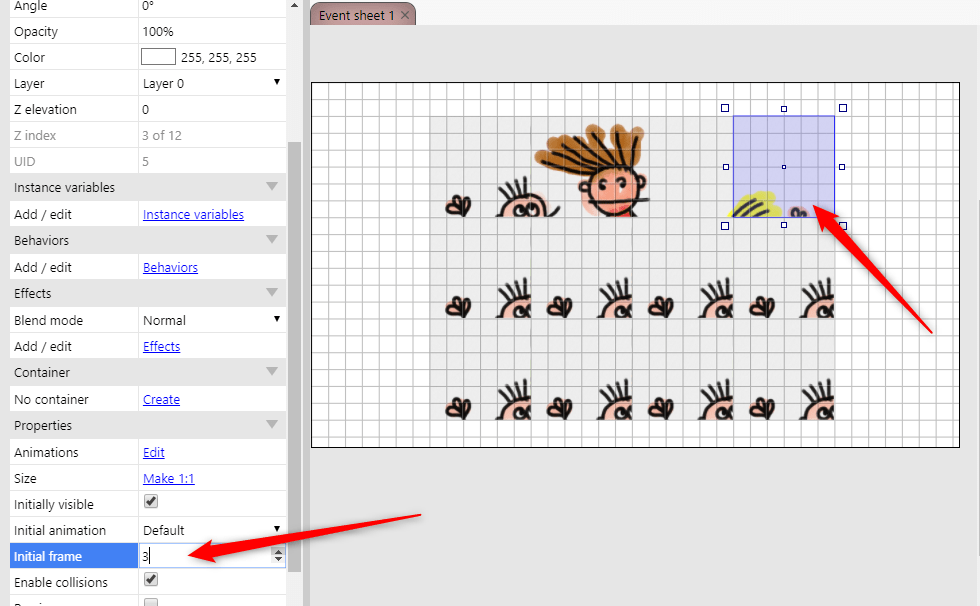
There are two ways to do this. We can manually change each animation frame in the Properties window on the right of the screen.
Click on the instance you want to change the image of and then go to the property panel on the left (you may need to scroll down to see the ‘Animation Frame’ option).
Change the animation frame so it shows the correct image (remember, the animations frames start at 0, so the top left will be 0, the next will be 1 etc).
While this isn’t too time consuming, we can also set the game to change the images automatically when starting.
5/ Automatically Set The Images
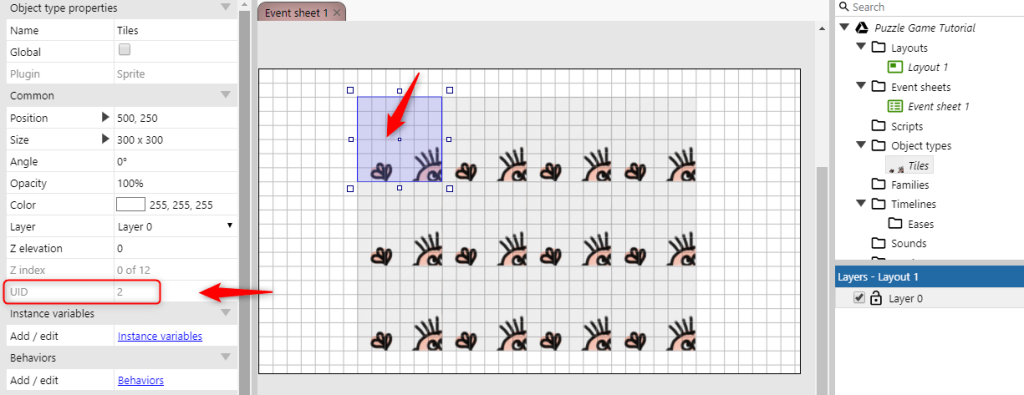
In order to automatically set the puzzle images, we need to know the unique instance identification (UID) for each puzzle piece. Each item in the game has its own UID and we can see this in the property panel on the left. Click on any puzzle piece on the page and you will see the UID.
Note: Remember, if all the images are still selected, deselect all the images by clicking elsewhere on the layout, and then click a single image.
Make a note of the top left UID.
IMPORTANT: In order for this to work successfully, we need the puzzle pieces AND the images to match in sequence, which is why we double-checked the sequence when loading the images and then set the puzzle pieces out correspondingly.
A Note About UID
Each object has its own UID. This is applied sequentially as objects are loaded. Therefore you will see in the image above, the top left piece is ‘2’, this is because I had previously loaded another object.
Click on Event Sheet. This is where we start telling the game what we want it to do.
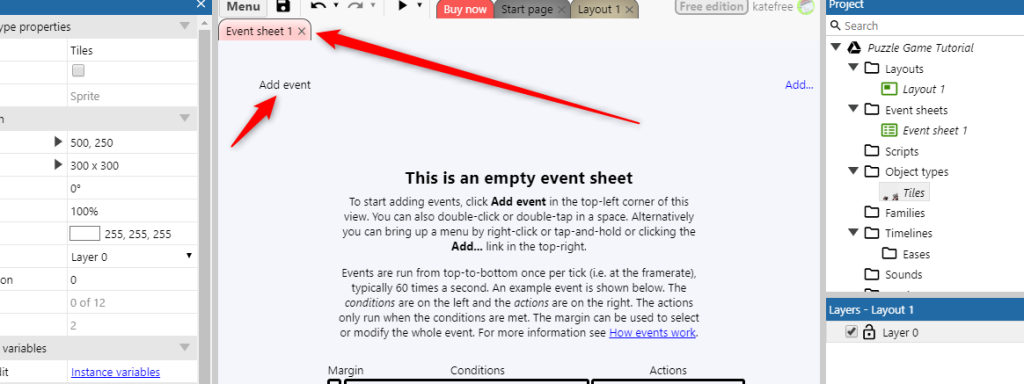
Click on ‘Add Event’
An Event is a condition and an action – when a certain condition exists an action is taken. For example, if a button is clicked, an item is created.
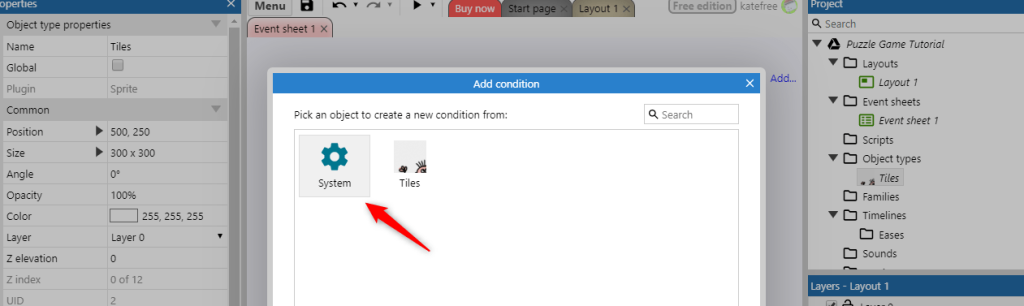
You will see you have two options, System and Tiles.
We want to select System as we are going to instruct the system to change the images when the game starts.
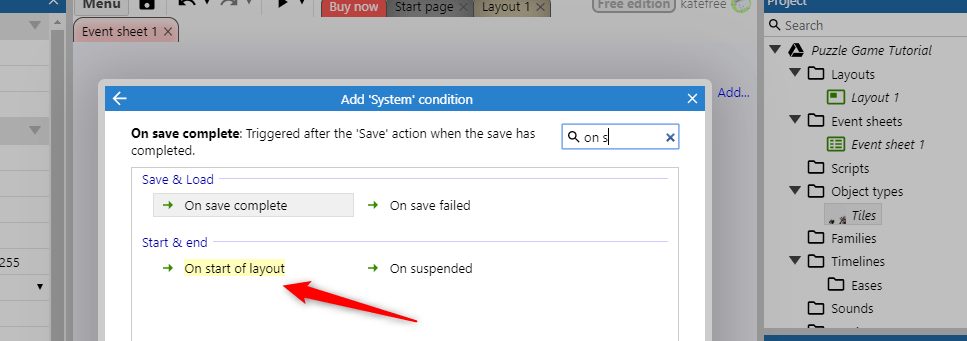
Then, choose ‘On Start of Layout’. Because there are several different options, it is easier to start typing into the search box to reduce the number of options.
Now we need to say what action we want to happen. Click on ‘Add Action’

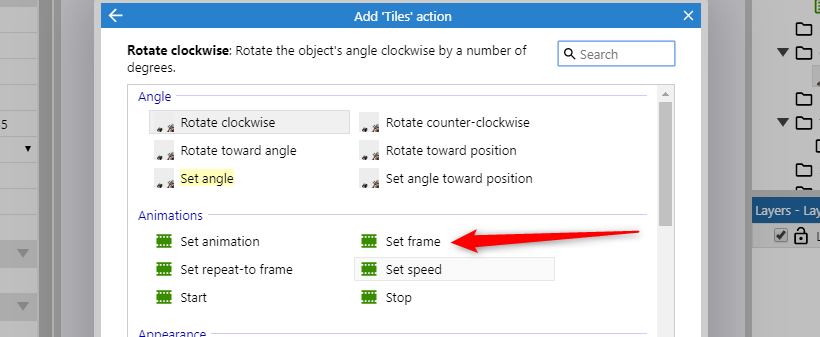
And this time select the Tiles icon.
We now want to set the Animation Frame. Select Set Frame from the options:
We now need to tell the game which frame to apply to which instance.
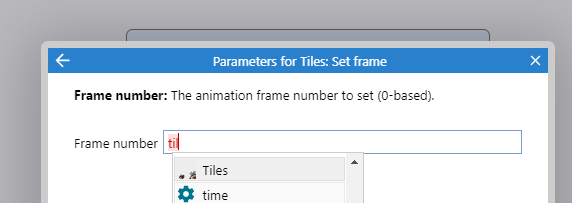
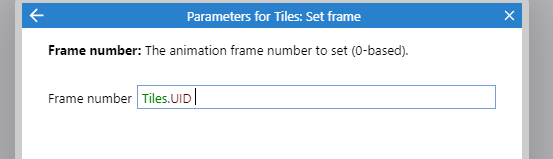
Click on Set Frame and this will open up a text box.
Ordinarily, we would just type in a number here, however we want this action to apply to all the instances of the object – to change all the puzzle pieces. Therefore we can use the UID to help us do this.
Note: In many areas of the program, when you start typing a few letters, the system gives you some options to choose from to save you typing the whole thing. We want to find the ‘Tiles’ object, and as you see below, when I started typing Tiles, the system found the Tiles object for me.
Instead of typing in a number, we’re going to use the UID number. This will be entered like this:
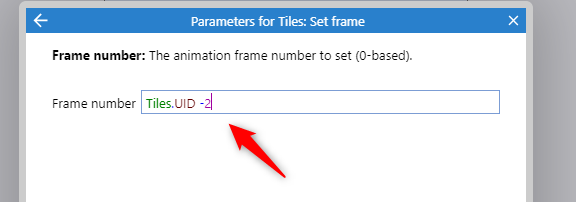
However, as we saw earlier, the UID may be 1, 2 or another number. Therefore we need to adjust this to make the number 0.
In the example the UID of this object is 2, therefore I need to take two away from the UID number to make it 0. In this case I am subtracting 2. You may need to subtract 1 or another number.
What this is saying is, take the Tiles UID number, which for the top left tile is 2, take 2 away, which makes 0 and use this as the frame number.
And for the second tile, the UID is 3, so when 2 is subtracted, that gives 1, which is the frame number.
The system will apply that to all of the the puzzle pieces at the start of the game.

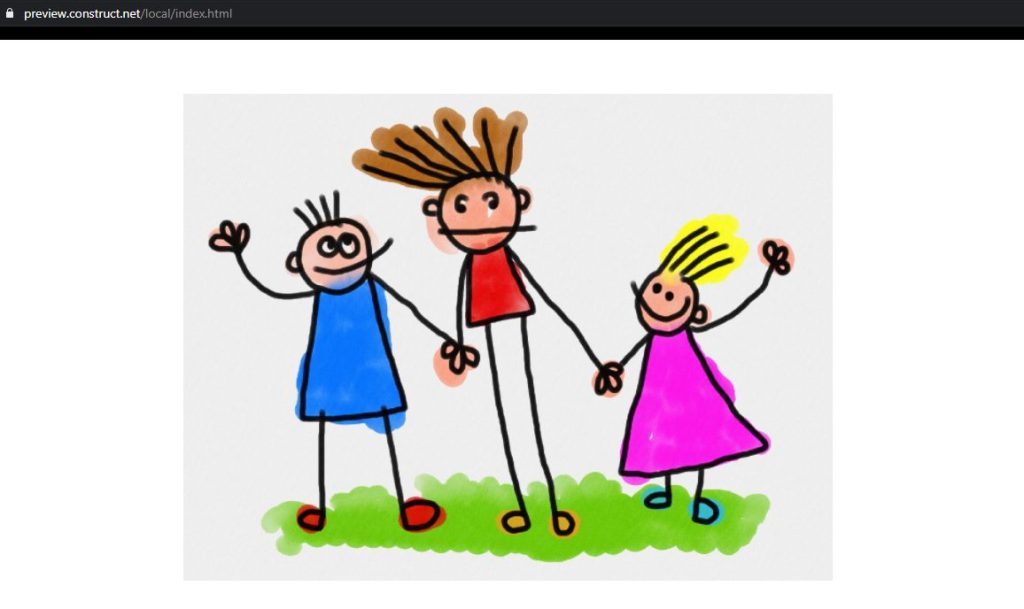
Now, if you click Preview, you should see all the puzzle pieces are in the correct place.
Save the project and we’ll move onto the next lesson!