Before we move further forward, we’ll tidy up our event sheet a bit and also change the order that a few things happen.
Introducing Groups and Functions
Our event sheet doesn’t look too bad at the moment, however, if we had hundreds or even just 10s of events, it can soon become unwieldy and confusing.
There are two ways we can handle this. We can use Groups to group things together. For example, we might group together all events that are related to the game play, or all events which control buttons.
We can also use functions to help streamline our event sheet. Functions are blocks of events we can call throughout the game. We would do this when we have an event we want to repeat several times in a game. Instead of creating similar events over and over again, we can create a single function and then call that, using an action, when we need it.
We will be creating a function which will prepare the tiles. Instead of this being something that happens at the start of the layout, when the puzzle is loading, we are going to change this so it happens on the click of a button. By creating a function, we need only create the events once, but we’ll be able to call them several times.
If this isn’t clear don’t worry – you’ll see how it works shortly when we add a function to the event sheet to manage moving from one puzzle image to the next.
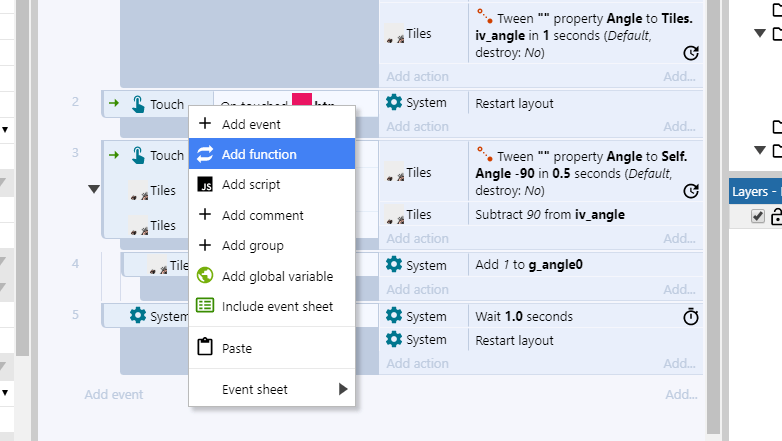
1/ Add a Function to the Event Sheet
To add a function to the event sheet, right click on the event sheet and select ‘Add Function’.
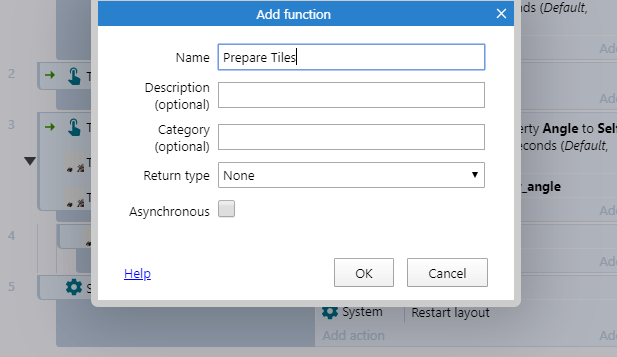
And give the function a name which makes sense such as ‘Prepare Tiles’.
Now we are going to drag the events which prepare the tiles for play into this function. These are the Tile actions in the At Start of Layout event.
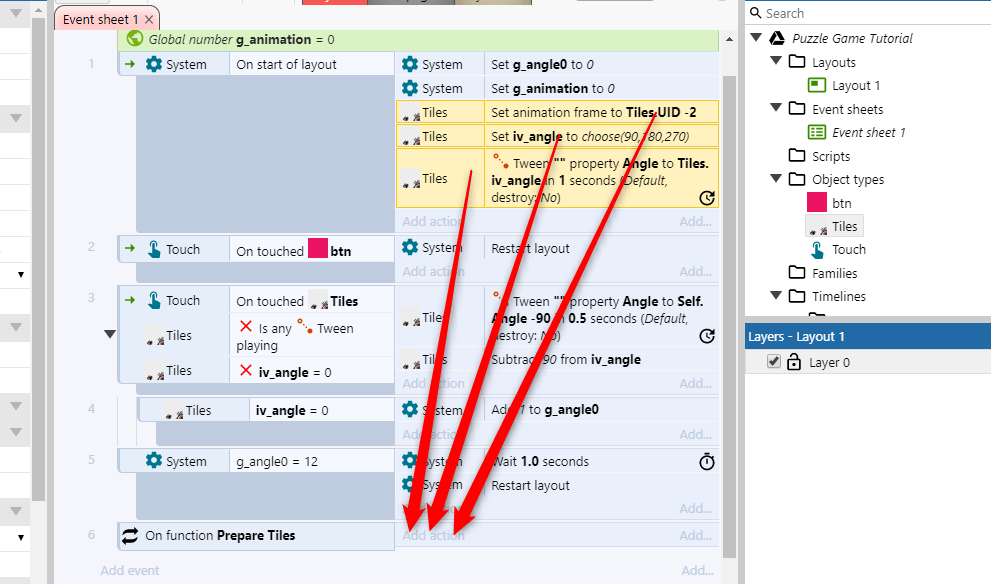
Drag these actions into the function. You can drag the actions one by one or hold down the Control key and click on the three actions you want to move and move in one block.
Note: Remember to keep the order of the actions you are moving-
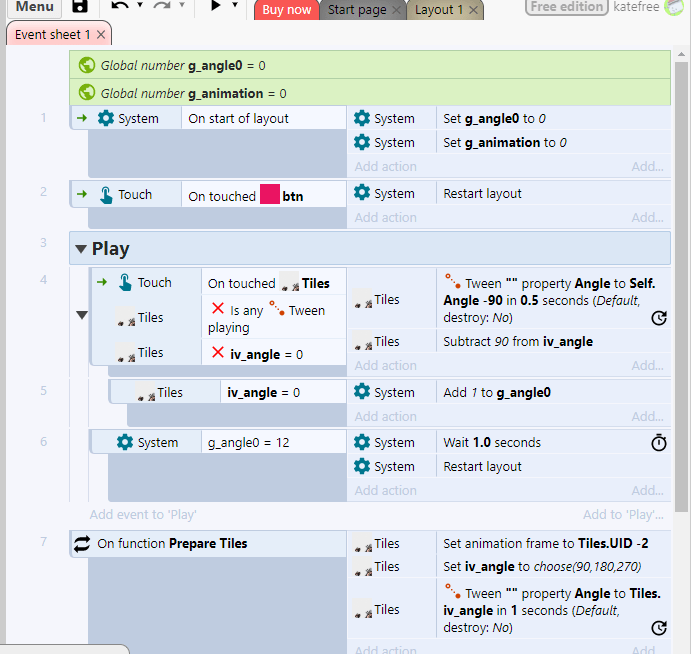
2/ Add a Group
We are going to add a group to hold the ‘play’ events. This is to keep the event sheet tidy and so we can find things easily.
The process is similar. Right click and select ‘Add Group’.
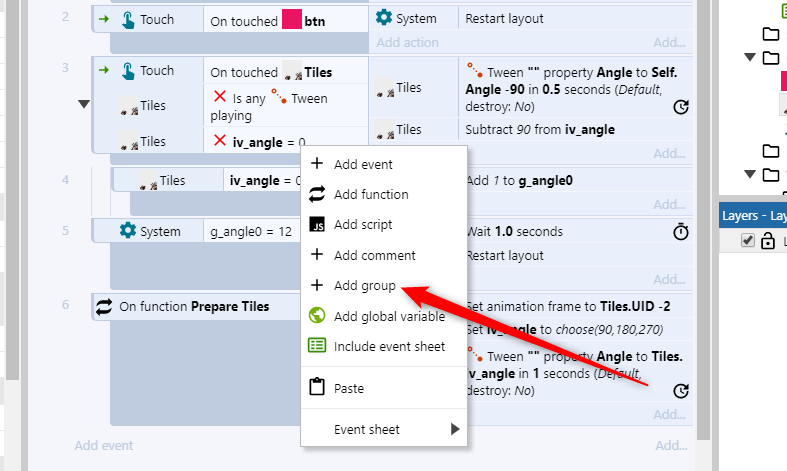
Call the group ‘Play’ and drag the play related events into this group.
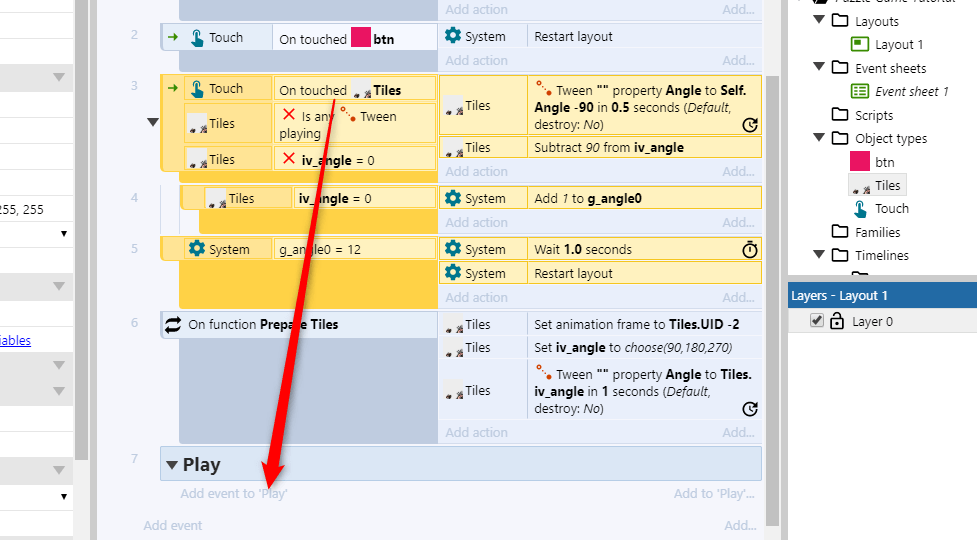
The event sheet will now look like this:
3/ Add Play Button
If you are to play the game now, you will see that nothing happens. This is because we are not actioning the ‘Prepare Tiles’ function. We need something to trigger this function and we’re going to add a ‘Play’ button which will trigger the function when tapped.
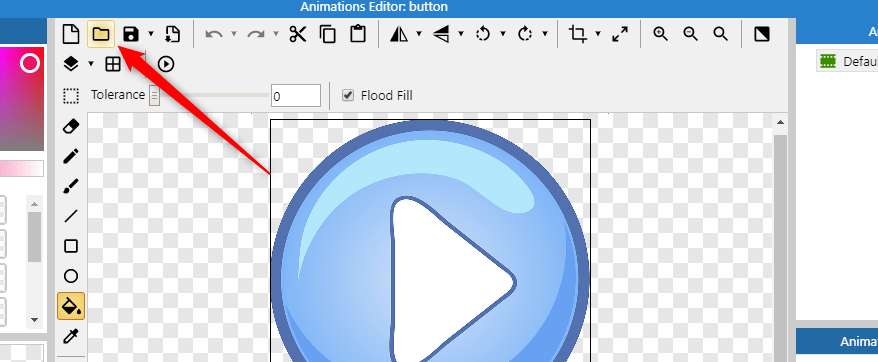
To download the play button, click on the link below.
Add the Play button by either dragging it onto the layout page (as we did with the puzzle pieces) or right click on the layout page and select ‘add new object’ and select ‘sprite object’ as we did with the restart button.
You can then upload your image using the file upload option at the top of the page.
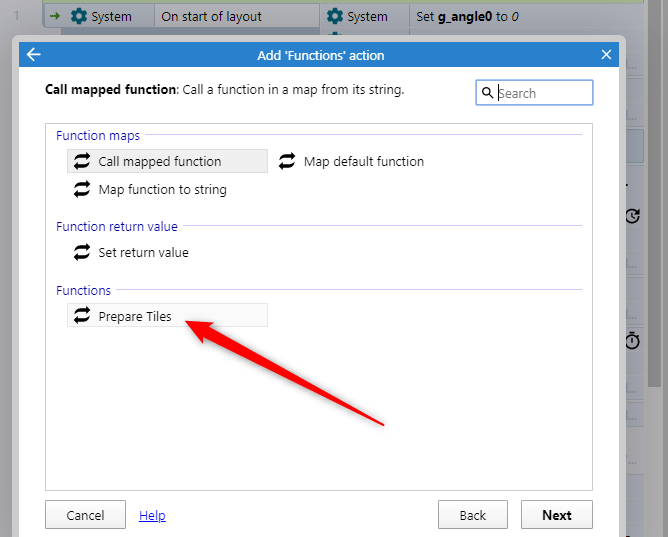
4/ Add Play Touch Event
Add a touch event and select the play button. We then want to add an action, using the Function object, which plays the Prepare Tiles function:
Next, we want the button to disappear when it has been pressed so it doesn’t obscure the screen.
To do this, we’ll move the button from the layout so it can’t be seen by the player.
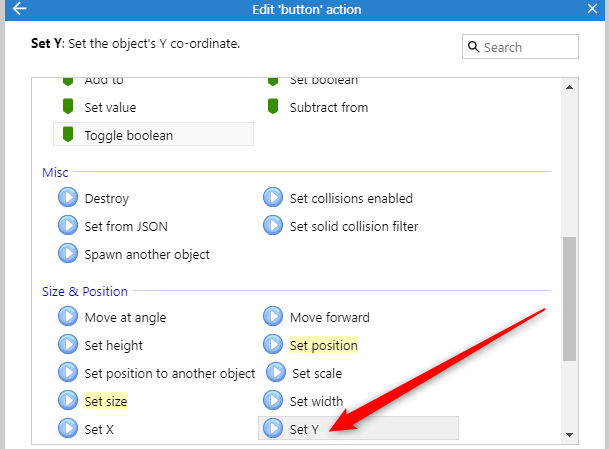
Create a new Button action and select the Y coordinate under Size and Position.
Set the coordinate to -300, this will place the button off the edge of the layout so it can’t be seen.
The one last thing to do is to move the button back ON to the screen again when the game is finished so it can be used again.
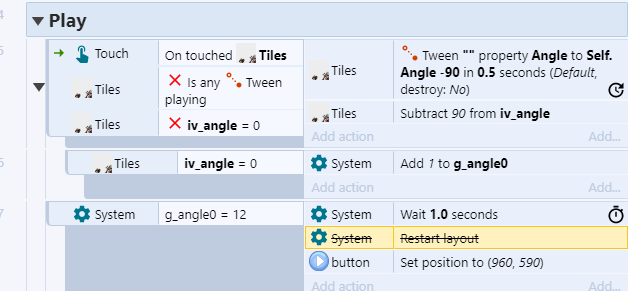
Therefore add a new action under the System Event which checks the number of tiles at 0 position and, after the ‘Wait 1 second’ action, delete the ‘restart layout’ and add a Button action > Set Position > 960 x 590.
This is moving the button back onto the screen when all of the pieces are in the correct place.